Standalone Projects
A Standalone project has no service connection and requires all spaces to be manually created.
To create a new project click the New Project button at the top right of your organization's view.

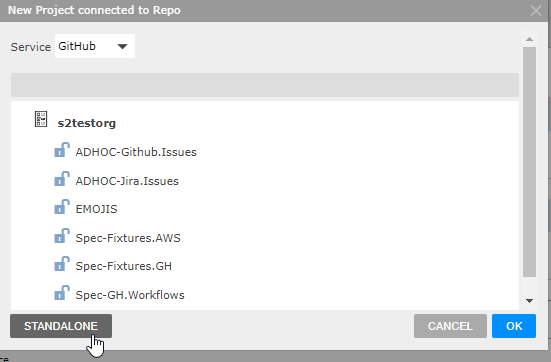
Select the STANDALONE button on the bottom left of the new Project dialog.
Options
| Option | Description |
|---|---|
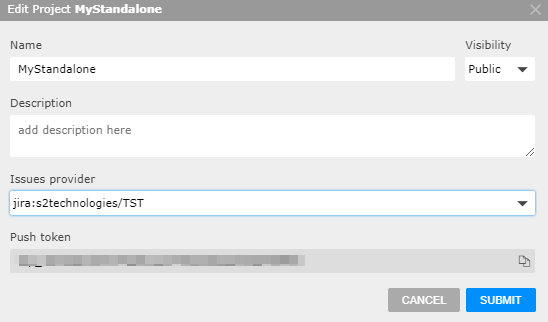
| Name | Names are not case-sensitive
/ & # ? |
| Public | When checked the project are visible to the public. Otherwise the project is considered private |
| Description | Textual description of the project. The description text supports a subset of Markdown. |
| Issues provider | Option to connect to GitHub or Jira issue tracking system. Generic is the default. |
Issues provider
The Issues provider option presents a drop-down listing all GitHub repositories and Jira projects available for issue tracking.

GitHub Repositories and Jira Projects require 3rd party service connections to be available.
Edit
To edit the settings of an existing project, in the organization's Projects tab, hover your mouse over a row in the listing, on the very left a "hamburger" icon will be shown. If you left-click on the icon, a menu is displayed with options:
| Menu item | Description |
|---|---|
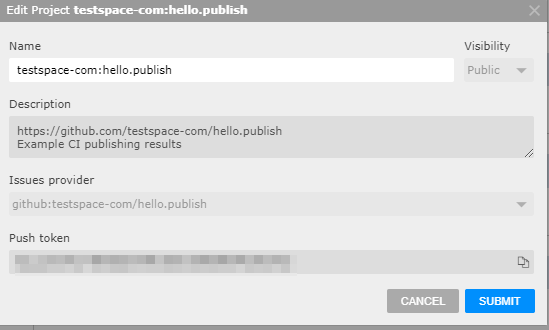
| Edit | Dialog for updating the default project name (<org-name>:<repo-name>) and accessing the Push token. |
| Access | Dialog for a selection of users that have access to the project with their current email notification settings. |
| Delete | A selection of users that have access to the project with their current email notification settings. |
Push Token
Testspace supports a unique project token to use with the Testspace client when publishing test results to this project.
The Push token can be copied from the Project's options Edit menu dialog.

Spaces
Spaces under standalone projects are manually created and can be updated or deleted at any time. They are used to collect and analyze data from any source (i.e. custom build automation). To create a new space, c/lick on the New Space button in the Spaces tab of a project's view.
Settings
| Option | Description |
|---|---|
| Name | Name of the space
|
| Description | Textual description of the space. The description text supports a subset of Markdown. |
| Sandbox | When checked the space is categorized as a sandbox and is not listed in the top level organization dashboard. Sandbox spaces do not send email notifications and are excluded from contributing to the parent project's Insights. |
| Copy settings from another space | On creation only, this allows you to copy settings from an existing "base" space. This includes metrics, badges, and thresholds. The prepopulated "base" content is given an auto-generated result name: [<number>]<base-space-name>#<base-result-set-name> |
| Health Indicators | Edit Space dialog only. Allows you to specify a Publication deadline for results in days. Exceeding the deadline fails the space's health. A value of 0 disables the deadline (default). |
Sandbox
Sandbox spaces are used primarily for staging new tests and have the following attributes:
- Issue generation disabled
- Results email notifications disabled
- Not shown in the Organization view
- Excluded from project Insights
Editing
In the Spaces tab in a project's view, if you hover your mouse over a row in the listing, on the very left a "hamburger" icon will be shown. If you left-click on the icon, a menu is displayed with the following options.
| Option | Description |
|---|---|
| Edit | Displays the Space's settings dialog. |
| Move | Displays a dialog allowing you to move the Space to a different Project. |
| Delete | Deletes the Space. |
Deletion
A deleted space can be restored up to thirty days after it has been deleted. When there are one or more restorable spaces there will be shown a special link below the Spaces Listing on contaning project's view.
Clicking on the Recover your deleted spaces link will show a special view which lists the Project's deleted Spaces within the thirty-day window. To restore an individual space in this list, hover your mouse cursor over the right end of the row that lists the space of interest. (Names shown in this list have extra text appended to the original space name to ensure that all names in the list are unique.) A clickable circular arrow icon is shown.
Clicking the icon will restore the space. (The original unmangled space name will be given to the restored space unless another space in the project already has this name, in which case the restored space will be given the mangled name.)
Retention Policy
To prevent abuse, the lifetime and count of Spaces in a standalone Project are bound to the following retention policy:
- 3 months to keep (independent of the count)
- 50 minimum to keep (independent of the timestamp)
Independent of the above, all metric data is maintained to provide statistics for the project.
The lifetime of individual Results is bound to a separate retention policy.
Deletion
A project can only be deleted manually through its options.
Deleted projects may be restored up to thirty days after they are deleted. When there are one or more restorable projects there will be shown a special link below the Projects Listing on the top organization view.
Deleted projects may be restored up to thirty days after they are deleted.
Clicking on the Recover your deleted projects link will show a special view which lists the Organization's deleted Projects within the thirty-day window. To restore an individual project in this list, hover your mouse cursor over the right end of the row that lists the project of interest. (Names shown in this list have extra text appended to the original project name to ensure that all names in the list are unique.) A clickable circular arrow icon is shown.

Clicking the icon will restore the project. (The original unmangled project name will be given to the restored project unless another project already has this name, in which case the restored project will be given the mangled name.)