Execution
The Manual tab lists the test specs discovered in the repository for a specific branch. A spec can be executed simply by clicking on it and hitting the START button.
The following listing is from the hello manual repo's main branch.

To quickly run a single spec just click on it and hit START.
Executing a spec outside a formally defined session is called standalone execution.
Run Spec
A spec is selected to execute as a standalone or within a predefined session. The test cases are defined within the spec and are provided status individually while running.
A spec is selected to execute as a standalone or within a predefined session.
Start
To run the spec, open the file and press the START button to begin execution. The left panel represents the set of cases associated with the spec.
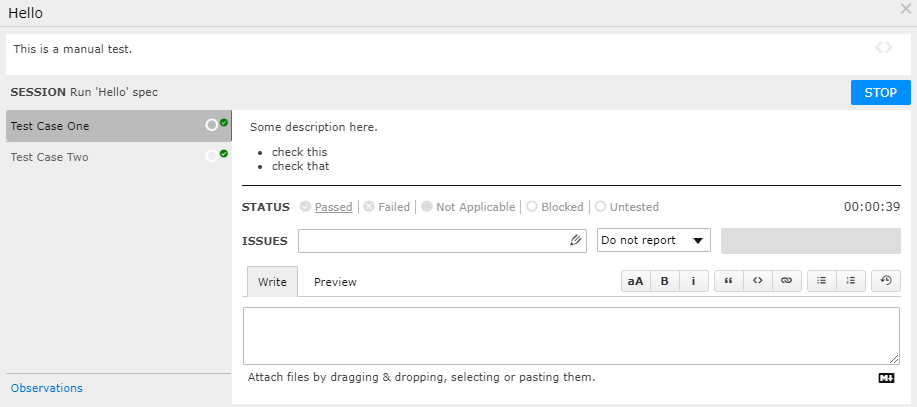
A case defaults to Untested. The following table lists the available case status that can be assigned:
| STATUS | description |
|---|---|
| Passed | Working as expected |
| Failed | Not working as expected |
| Not Applicable | Marked as NA in the case |
| Blocked | Not able to execute the test case |
| Untested | No testing as of yet |
Issues can be directly listed or referenced from within the comments form. For more details see further down.
The comments form supports markdown, including drag and drop images, and in-place issue references. There is also a toggle providing access to previous execution history:
The timer starts after clicking START.
Stop
On selecting STOP the execution, if there are any untested test cases, a dialog will be presented:
If left checked (default), all test cases not executed will carry their previous status.
By default, test cases that are not executed will carry over their previous status.
Session
A test session defines a set of specs and describes the purpose of the testing activity, such as validating a new set of functionality. There are no limits to the number of test sessions that can coexist.
Use a session to define a collection of specs for execution.
New
The listing is used to select specs for a new session:

The Select spec options:
Allused for choosing all specsNoneused for de-selecting all specsOnly failingselects specs that have 1 or more failing casesNever ranselects specs that have not been executed
Once the specs have been selected, click on the New Test Session button.
A dialog will be presented.
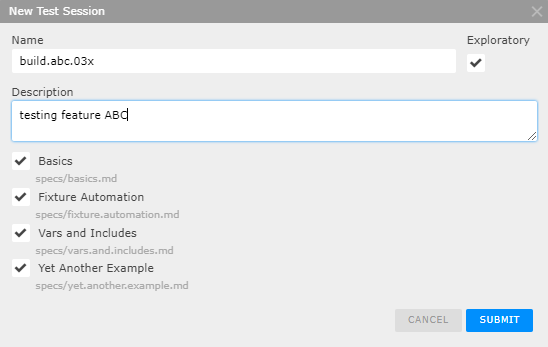
- Add a
Namefor the session, or use the default (i.e. Sequence_n) - Enable or disable
Exploratory - Add an optional
Description(e.g. "testing feature ABC") - Select
SUBMIT
When a session is created it is tagged as open, until explicitly completed. There is no limit on the number of concurrent open sessions.
There is no limit to the number of concurrent sessions opened.
To see the status of a specific session, highlight it using a single click.
Complete
A session can be completed at any time, independent of what specs have been executed. Click on the solid blue circle w/ check or use the hamburger menu.
- Completing a Test Session removes the active session from the Manual tab.
- Once a session has been completed no additional updates can be made.
If no Specs have been executed and the session is completed, the results record will be ignored (same behavior as deleting the session).
Groups
Test Specs can be grouped using repo source folders. When a large number of test specs are required, it is often useful to group similar tests in folders. The following repo example - https://github.com/testspace-com/demo - uses two groups: account and power:
root
  └─ specs
      └─ account
          └─ logout.md
          └─ sign-in.md
          └─ sign-up.md
      └─ power
          └─ turn-off-power.md
          └─ turn-on-power.md
      └─ ..
  └─ .testspace.yml
  ..
Testspace automatically recognizes the folders and presents them in the listing.

Each group will maintain its status, along with an Overall status.
The results tab will also maintain status corresponding to the grouped defined in the repo. Using the example above:
Assignee
Using the specs listing, a user can be pre-assigned for the execution of a spec, which will then be used as the default on all subsequent created sessions.
By clicking on the Assignee cell of the spec a dialog of available users will be presented.
A user can also self-assign, and overwrite an existing assignment when running a spec.
Spec Changes
When a spec with existing status has its corresponding spec source file changed (i.e. via repo commit), a special orange warning icon will be displayed, indicating newer source code changes.
The run dialog also indicates source file changes.

By clicking on View latest instructions..., the most recent updated source will be presented.
For existing open sessions, there will be no updates or indications of changes, however, any newly created sessions will automatically pick up the changes.
Testspace tries to gracefully handle source changes and preserve execution history and failure tracking. However, renaming a
test case(i.e. changing the markdown<H2>heading that denotes it) can not be handled and will result in loss of history.
Issues
GitHub issues can be associated with test cases. There are two ways - push new issues or reference existing issues.
Push New Issue
GitHub issues can be auto-generated within the test case execution. By default, on a failing test case, the Push new issue checkbox is selected.
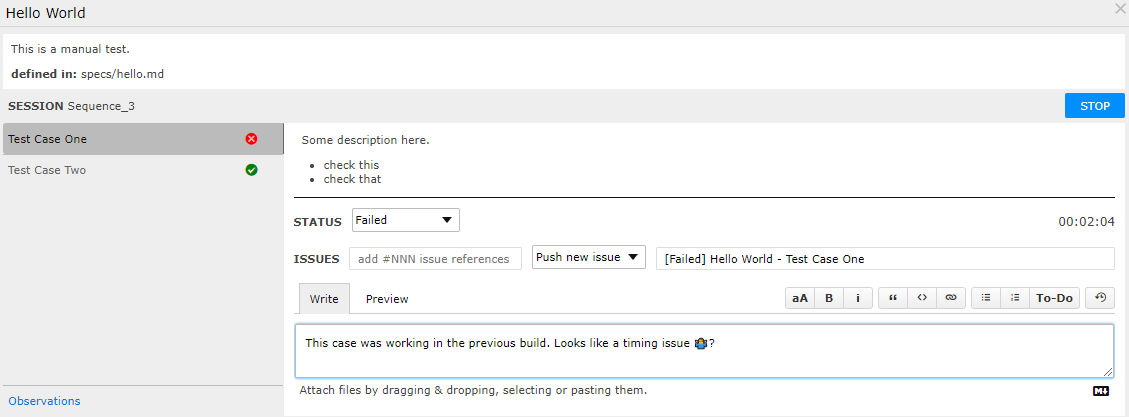
The auto-generated Issue will insert the status in the title [Failed], along with the spec name and test case name. Comments from the test case will be added to the issue automatically as well.
The Issue is generated on the spec run STOP event.
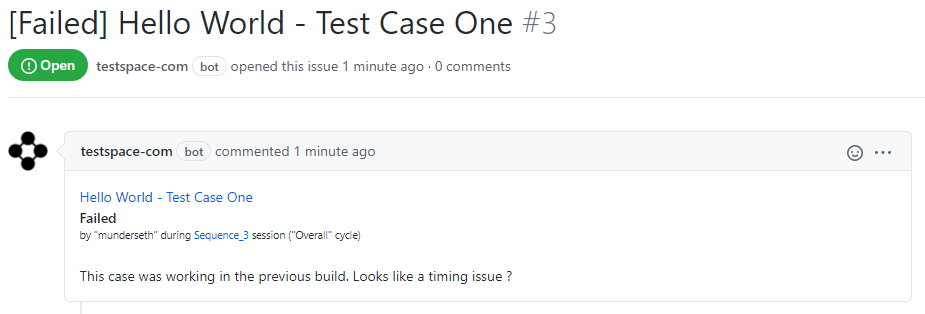
The generated Issue will be automatically added to the ISSUES form for future reference.
Reference Existing Issue
If you want to reference an existing GitHub issue in a test case, you could either list it in the ISSUES form or simply mention it in the comments form inside any message describing your testing. In both cases, it needs to be formatted a #-prefixed Github issue number, e.g. #123.
Automated Fixtures
Specs that contains the automated fixture before, and optional after, have additional execution constraints. There will be an exclamation icon next to ! START indicating a Required action to be performed:
Before Fixture
The before fixture is required to be successfully processed before test cases can be executed. It is automatically triggered by clicking on the blue START button. While running a gray spinning icon would appear.
In case of failure, a red cross icon would indicate unsuccessful automation. The tooltip will provide additional failure information.
The before fixture has several constraints that govern the execution of the spec:
- Closing the dialog while executing will cancel the execution
- Closing and opening the Spec will require re-execution of the automation
- Executing longer than
5 minutes, the user will be prompted to Continue with execution
For Fixtures executing longer than 5 minutes, the user will be prompted to Continue with execution.
After Fixture
The after fixture is optional and could only exist if there ia also a before fixture. If the Spec has successfully executed, once the Spec dialog is closed, the associated after fixture automation is executed, in the background, without any status available to the tester.
The after fixture will automatically execute when:
- The user selects
STOPorXwith in the spec run dialog - The browser tab or computer is shutdown
- No user activity for
10 minutes(user prompted with 60-second countdown)
Exploratory
Exploratory testing is a test flow that provides additional test coverage and usability assessment, using a non-scripted testing approach.
Exploratory testing is non-scripted, no-constrained observational-based testing.
There are two variants of exploratory supported by Testspace:
- Spec based
observations - Session based
observations
Both types support pushing issues to GitHub.
Spec Observations
When running a spec additional observational content can be added. To add observational comments click on Observations, located at the bottom left of the spec dialog:
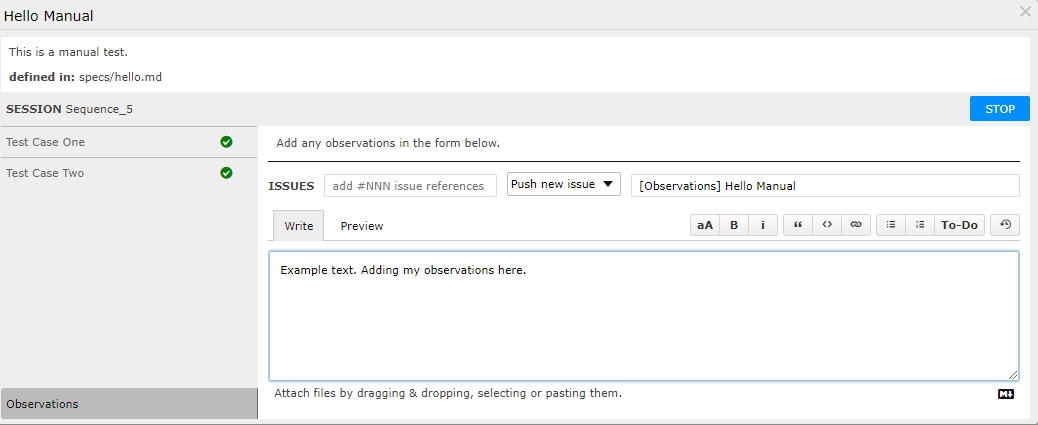
- The ISSUES associated with observations is defaulted to
Do not report
Session Observations
Session observations are created by selecting the Exploratory checkbox in the creation dialog:

Once the Session is created a built-in Exploratory session spec will be provided.
The Exploratory is a generated spec used to capture observations by one or more testers for the session.
The Exploratory session can be executed by multiple users. All of the observations will be automatically added to a GitHub Issue, named after the session.
Results
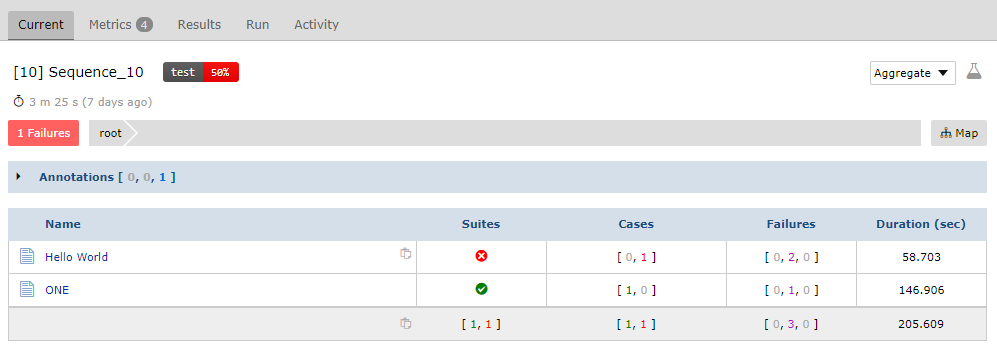
A test session suite's status, when completed, are aggregated together with all other previous sessions and reflected in the Space Results. A Space always represents the most up to date status for each suite.
Aggregation
A Space presentation of results is aggregated by default. Aggregation is the inclusion of status for all Suites based on their most recent completed session.
When a session has completed, the status for the suites executed in that session are aggregated with the nonexecuted suites from previous results. This results in suites that were not executed to be carried forward.
Carrying forward is including suite status from previous sessions
For Suites that have been carried the Summary section of the Suite report provides context information in the Session field:
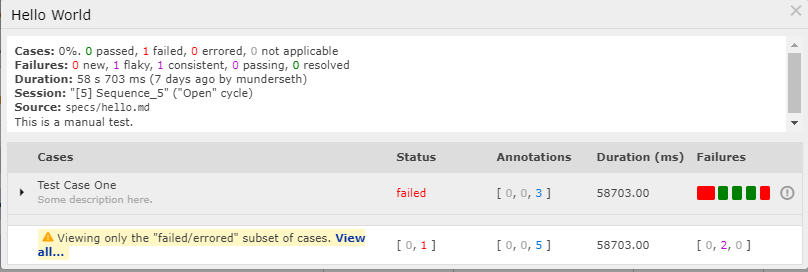
When non-current sessions (older sessions) are completed the status of any carried forward suites will be updated in newer completed sessions as appropriate.
Session
Results can be viewed both from an Aggregated view or a Session view. In the right corner of the page, a selection box exists: Aggregate | Session.
When Session is selected the page presents only suites executed for the session in view.

Issues Metric
When Issues are pushed and/or referenced during a test session, they are automatically captured in an Issues metric once the session is completed.
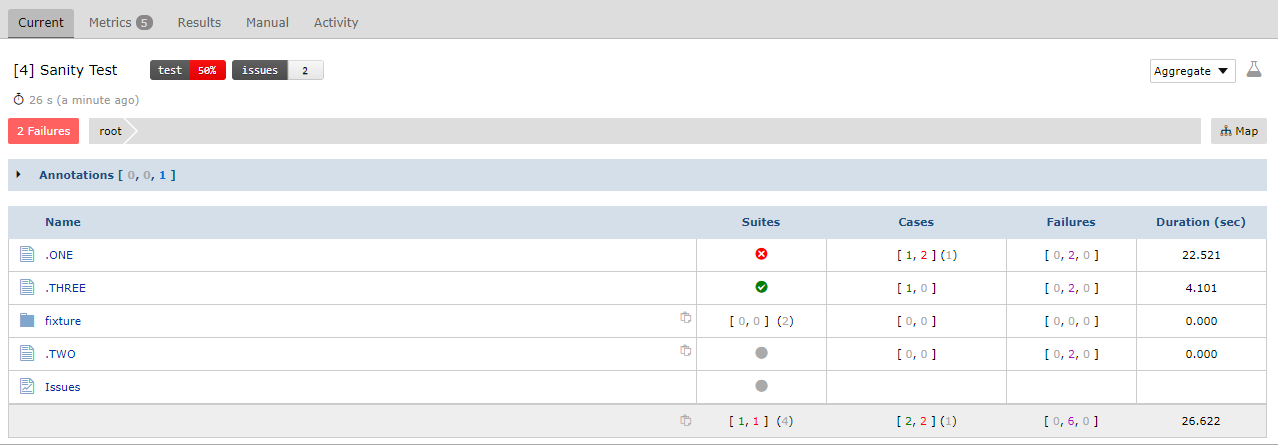
The Issues metric suite presents a report listing of all issues' references and status at the time when the results were published:
The Issues metric graph is automatically generated tracking the number of issues as seen in the report.
There is a badge that contains the number of open issues at the time of publishing.